如何使用Github Actions实现自动化部署Hexo博客
Hexo 是一个基于 Node.js 的静态博客框架,它以简洁的速度和易用性受到许多开发者的青睐。如果你的博客部署在github上,那么这里有一种新的部署方式可能让摆脱频繁提交部署的苦恼!GitHub Actions 为自动化部署Hexo提供了一种解决方案,极大地简化了部署流程和节省了时间,可以让我们更多的专注到写作本身。
为什么使用Github Actions
- 将文章源文件和部署文件分离,有助于保护源文件中的隐私和你的草稿文件等
- 节省手动部署的时间,专注于写作本身
- 学习Github Actions相关知识,不折腾不作死发作了
如果你符合以上任何一条,你都应该考虑往下看下去。
什么是Github Actions
GitHub Actions 是 GitHub 推出的一项强大的自动化工具,它允许用户在 GitHub 仓库中创建、编辑和运行自动化脚本,这些脚本被称为工作流程(workflows)。这些工作流程可以响应 GitHub 上的各种事件,例如代码被推送、issue 被创建、pull request 被打开或定期调度任务等。
GitHub Actions 的工作流程(workflow)由 YAML 文件定义,这些文件放在仓库的 .github/workflows 目录下。每个工作流程文件描述了一系列的作业(jobs)和步骤(steps),定义了运行环境、触发条件、要执行的任务等。
前期准备
创建两个仓库
创建部署仓库
- 建立名为
<你的 GitHub 用户名>.github.io的公开储存库,若之前已将 Hexo 上传至其他储存库,将该储存库重命名即可 - 将 Hexo 文件夹中的文件 push 到储存库的默认分支,默认分支通常名为
main,旧一点的储存库可能名为master - 开启Github Pages能力,使其可以
https://<你的 GitHub 用户名>.github.io访问
比如笔者使用2ue.github.io储存库用于存在文章编译后的代码,开启github pages后可通过https://2ue.github.io访问
创建文章源码仓库
- 创建一个私有仓库,用于储存文章源代码
比如,笔者使用myblog储存库存放文章的源文件
至此两个仓库已经准备完了,后面所有的操作都在myblog上进行
生成Personal access tokens
github提供了access tokens的能力,可以在不登录的情况访问仓库和操作仓库等,所以我们可以通过相关能力来实现自动化部署,但同时也要保管好该token
Personal access tokens申请地址:Personal access tokens
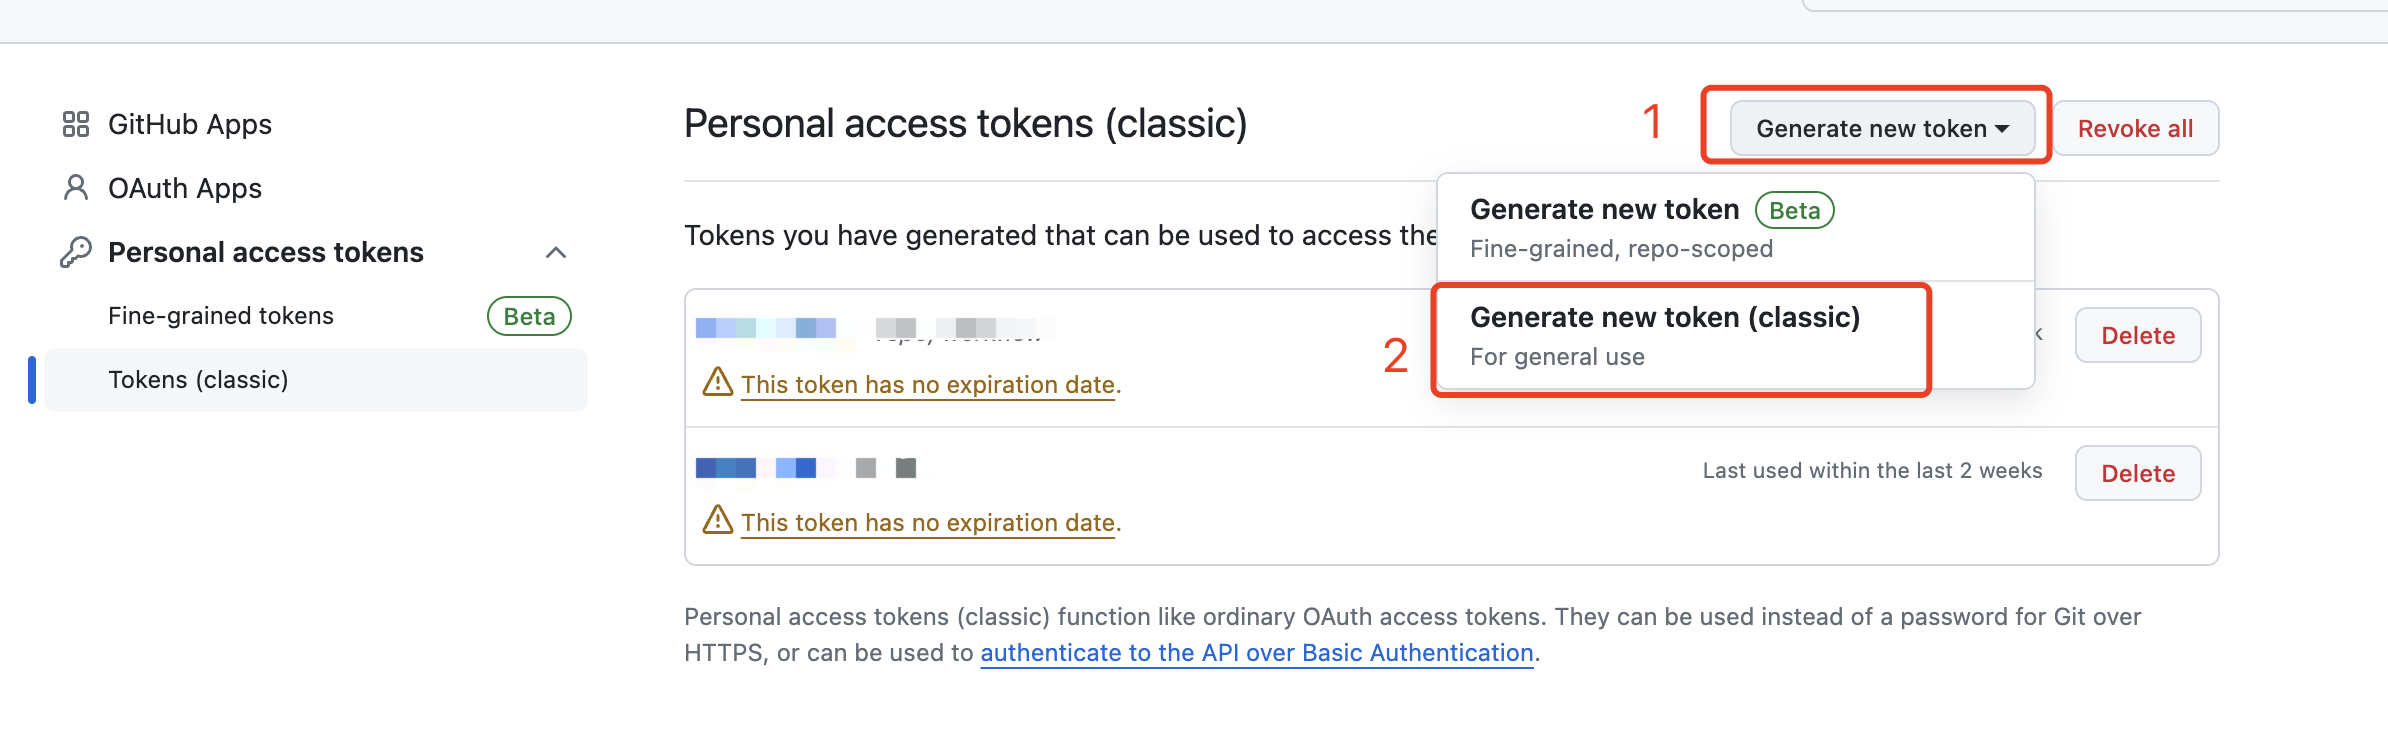
打开网址后,点击 Generate new token -> Generate new token (classic)
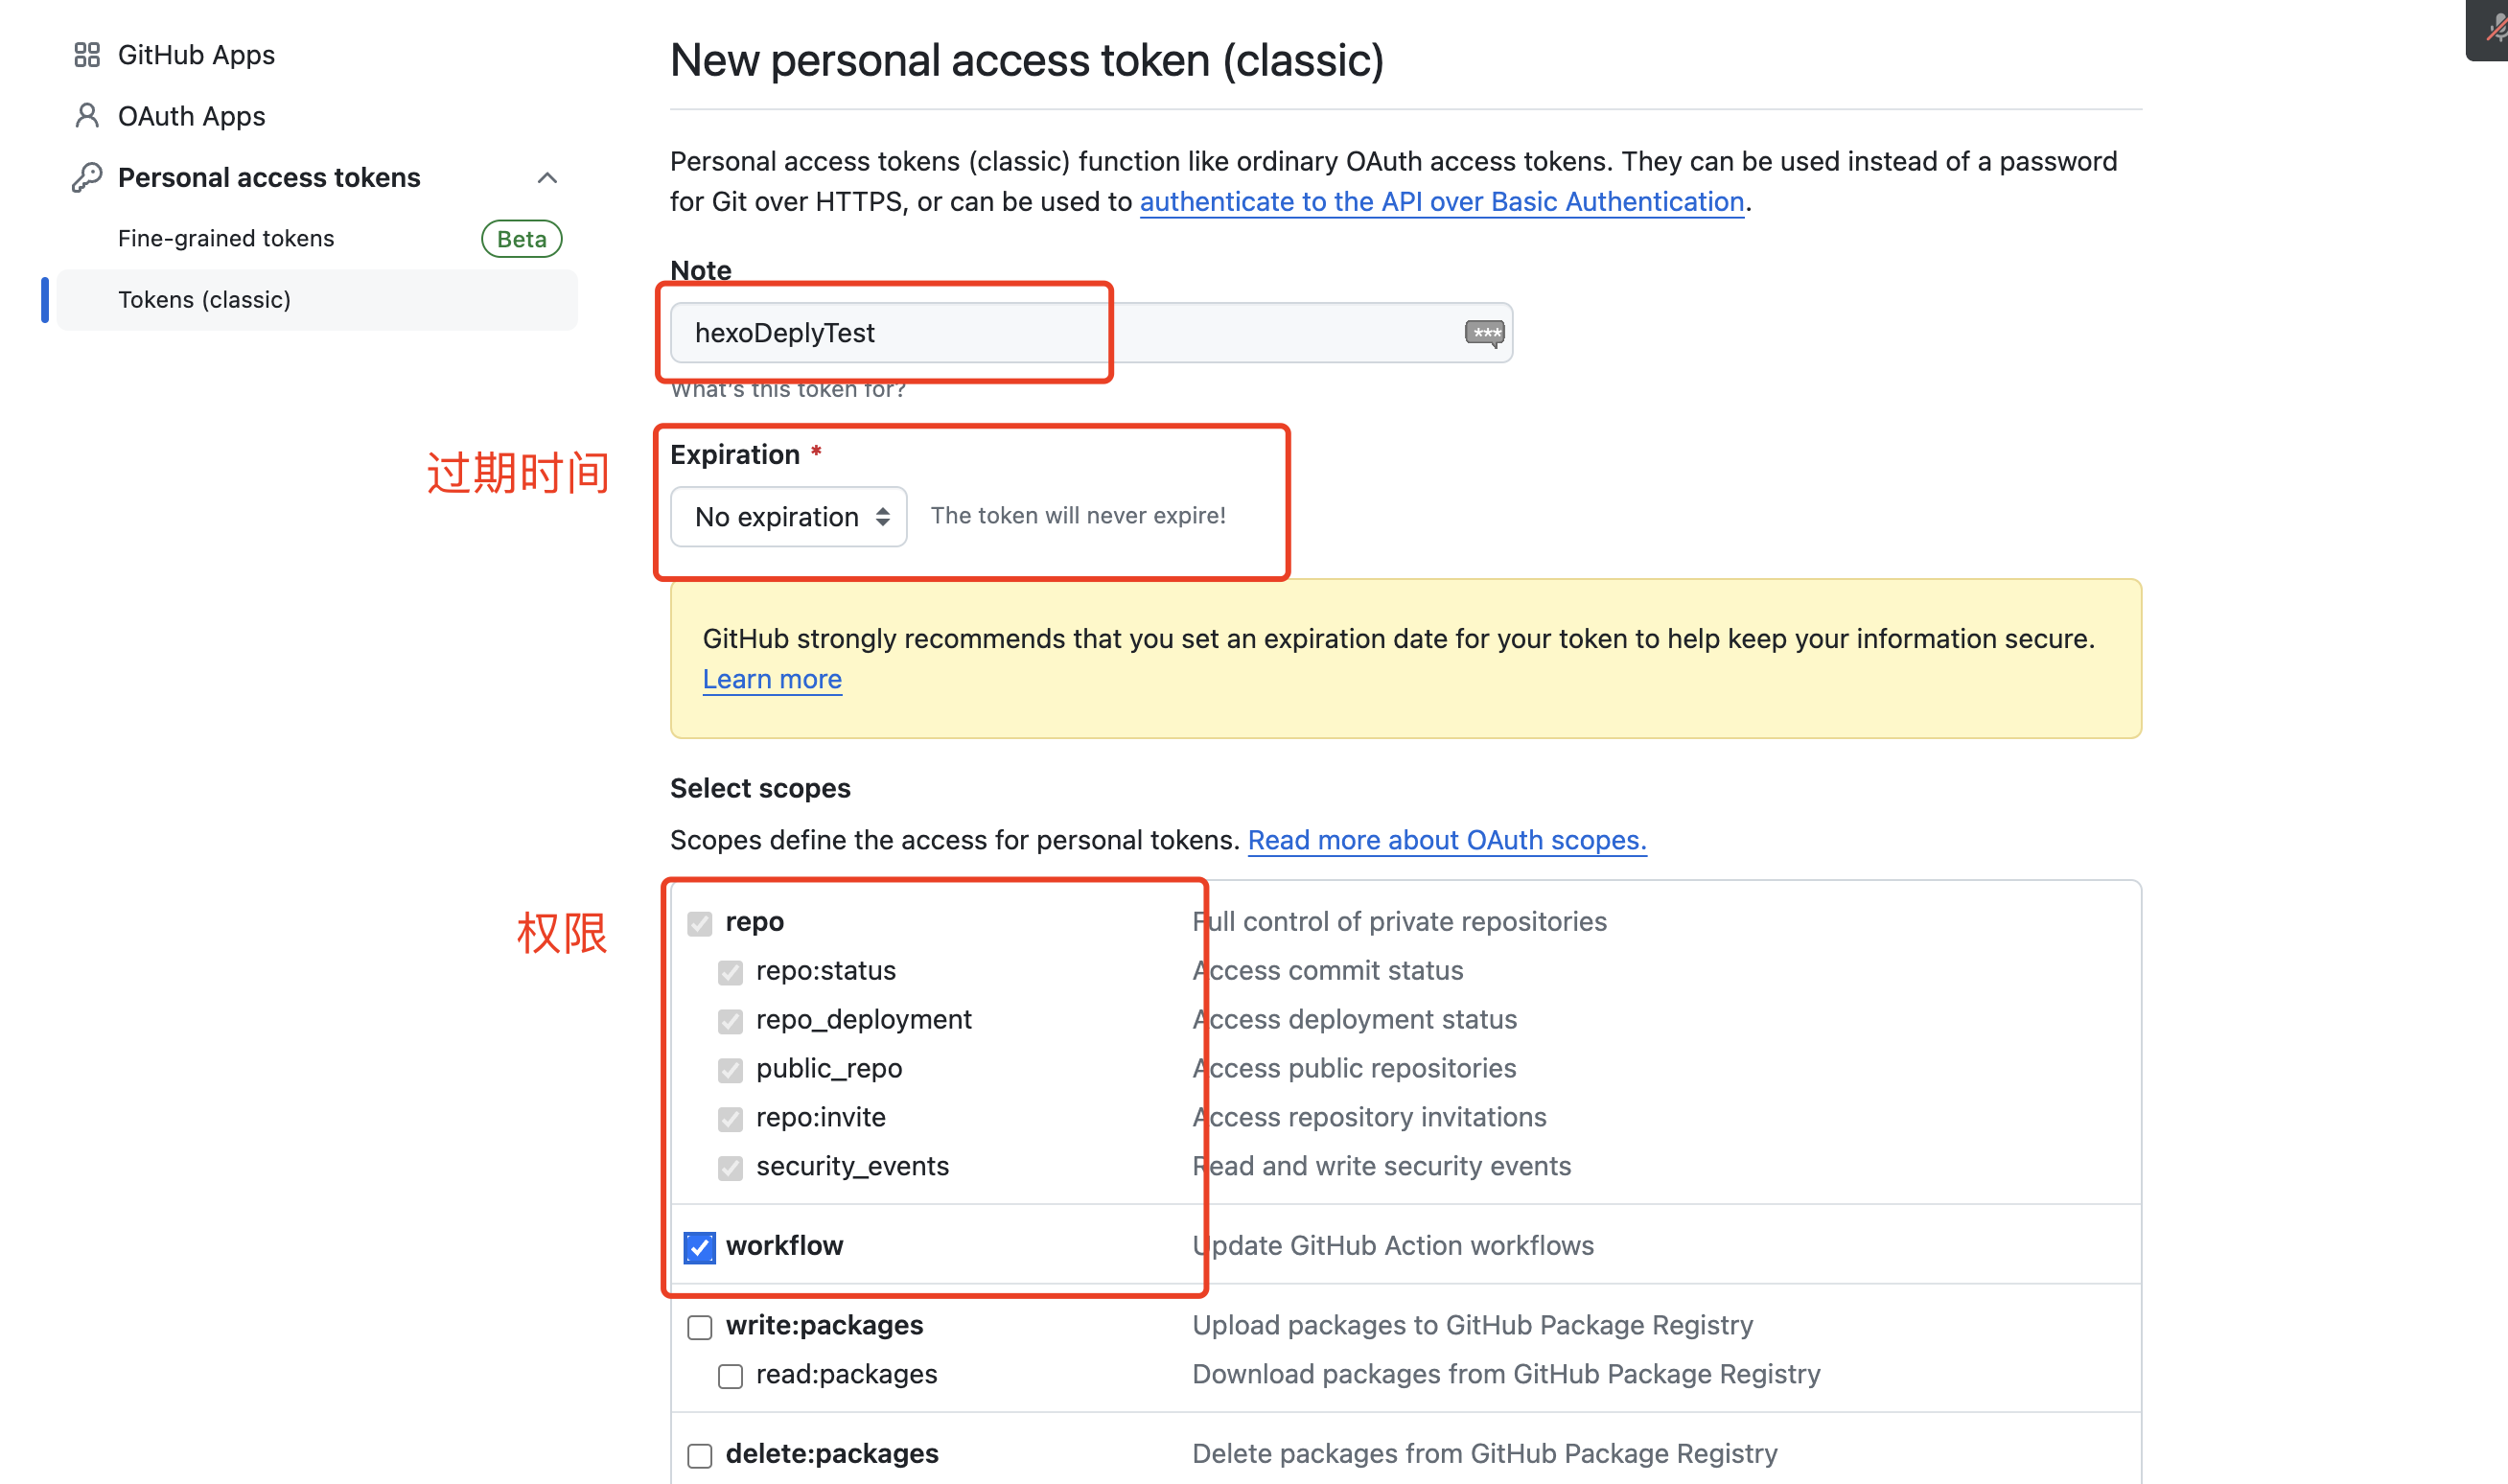
然后依次填写
- Note: 注释或者名字,按自己喜欢填写符合规则的名字
- Expiration:过期时间,可以选择合适的时间,这里我选择的是永不过期,No Expiration
- Select scopes:选择权限,勾上repo和workflow,这里的作用是使得这个token具有读写repo的权限和通过github Action更新的能力
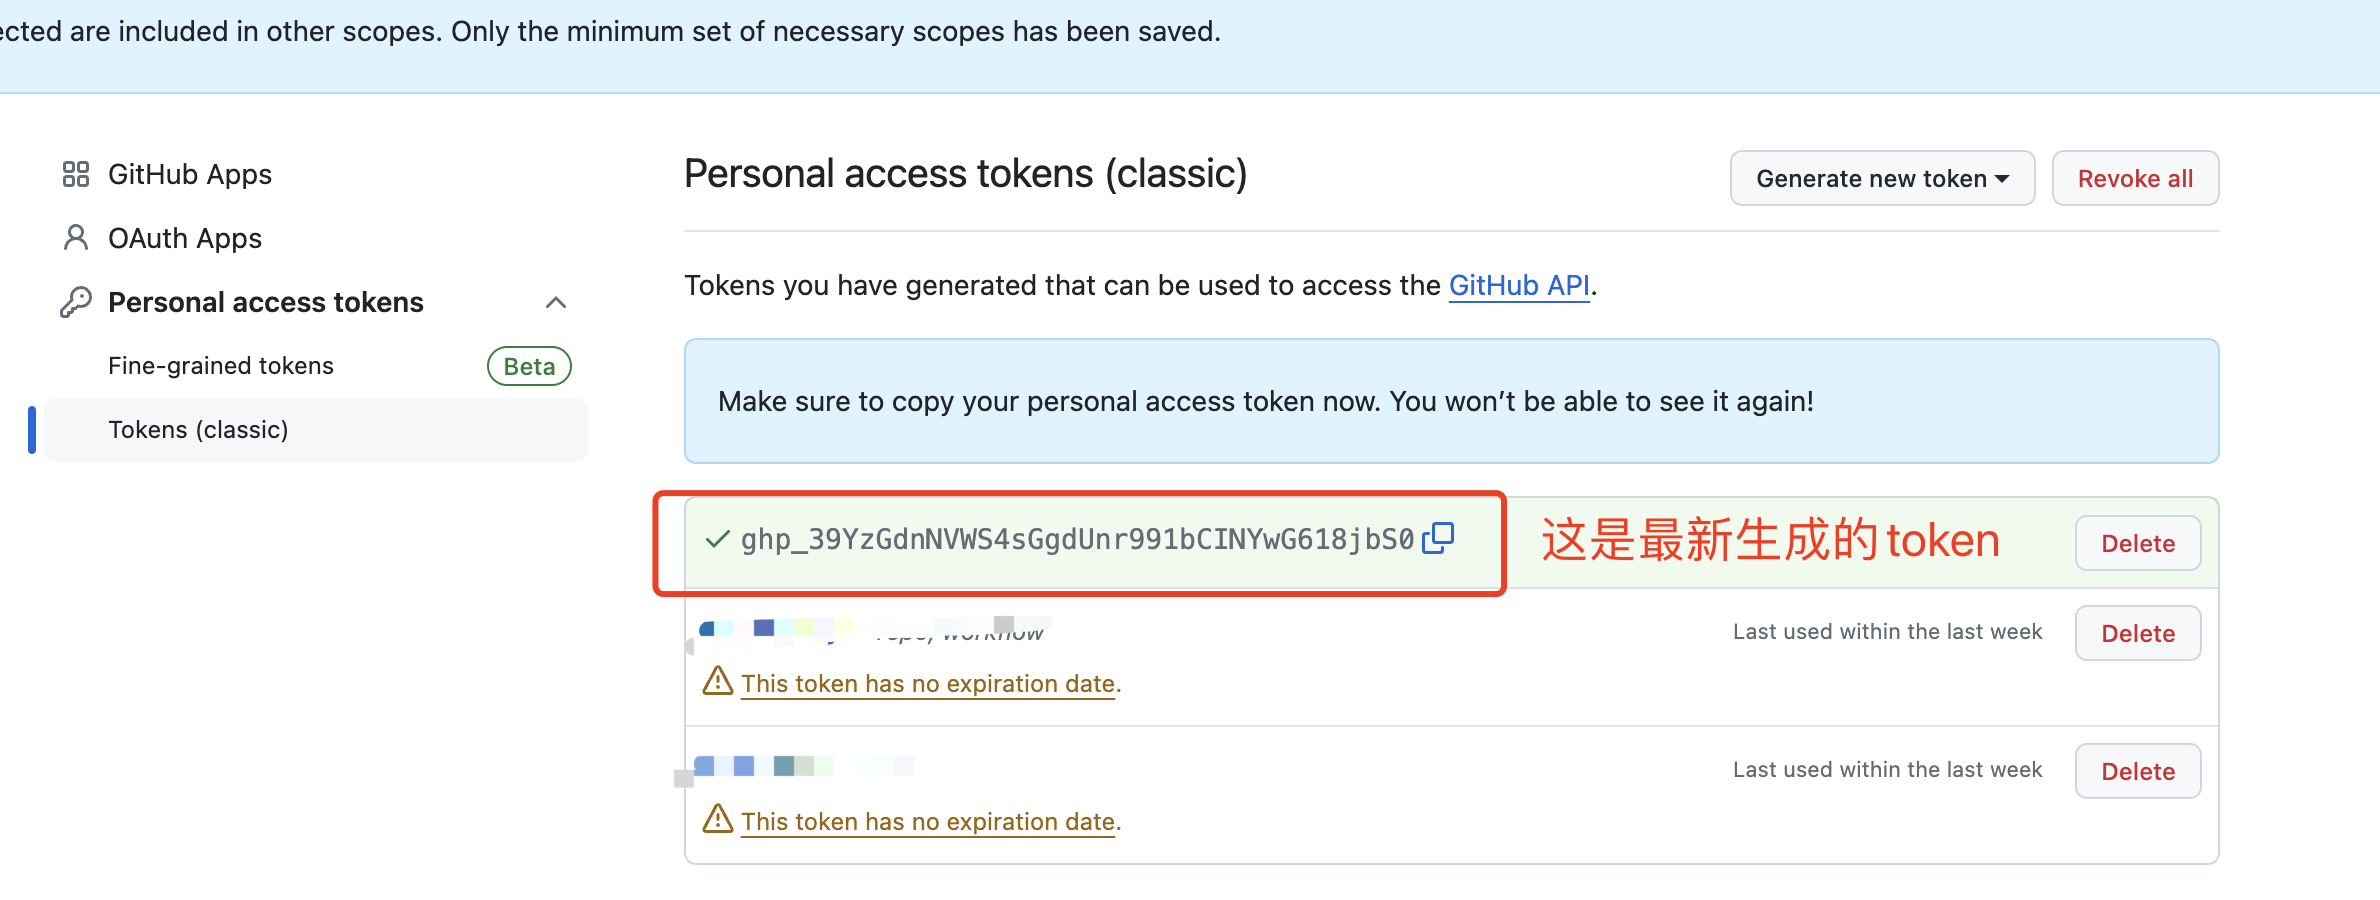
拖到页面最底部,点击生成按钮
token生成后,会在这里展示刚刚生成的token。
注意:新生成的token只会在创建时显示一次,刷新之后就会消失,记得备份保存,如果忘记了,删除重新生成即可
Token填写到myblog仓库
点击:New repository secret ,将刚刚申请的token填入:
- Name:尽量按规范使用大写,多个单词用_分割
- Secret:填入刚刚申请的Token


部署脚本编写
将myblog仓库代码克隆到本地,新增.github/workflow文件夹,然后再新增一个.yml的文件,假设这里叫hexo-deploy.yml,然后将以下代码复制到文件中,保存后使用git提交到myblog仓库
1 | name: deploying Hexo project to GitHub pages |
至此Hexo利用Github Actions自动化部署就实现了
部署
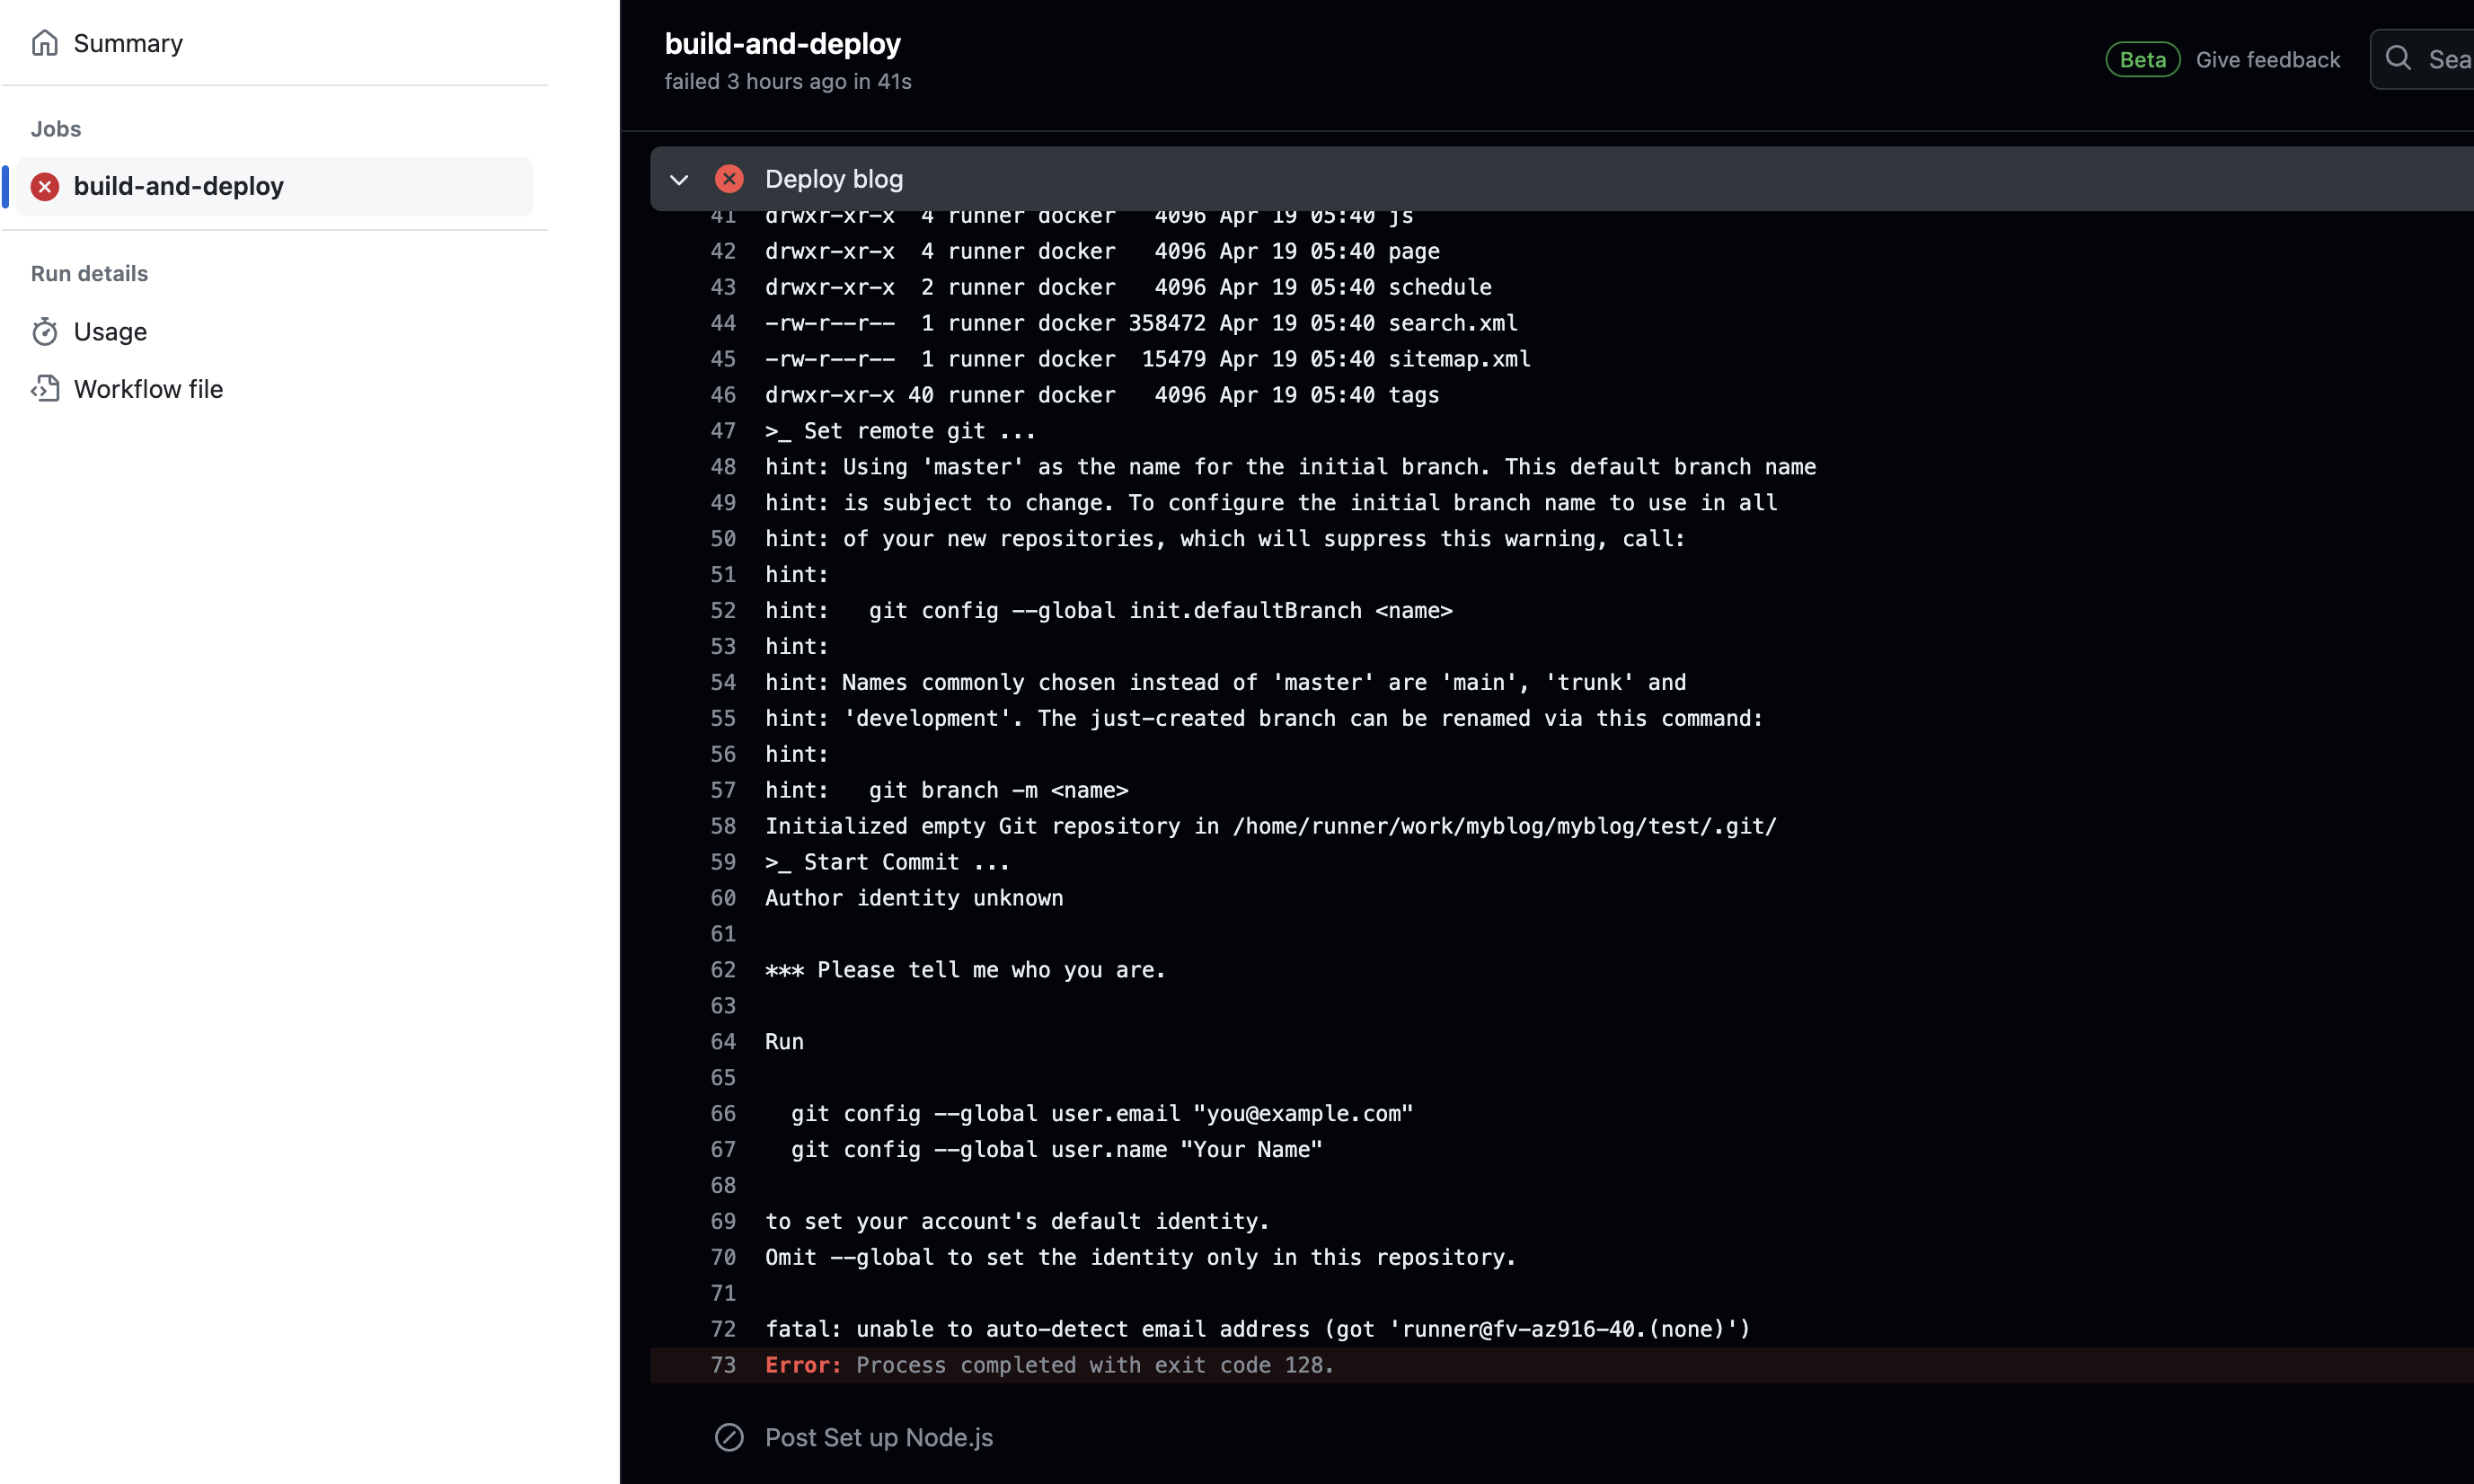
将代码提交到github后,打开github的myblog仓库(你自己的文章源文件仓库),点击:Actions可以看到有任务正在执行,以下是执行成功后的界面:
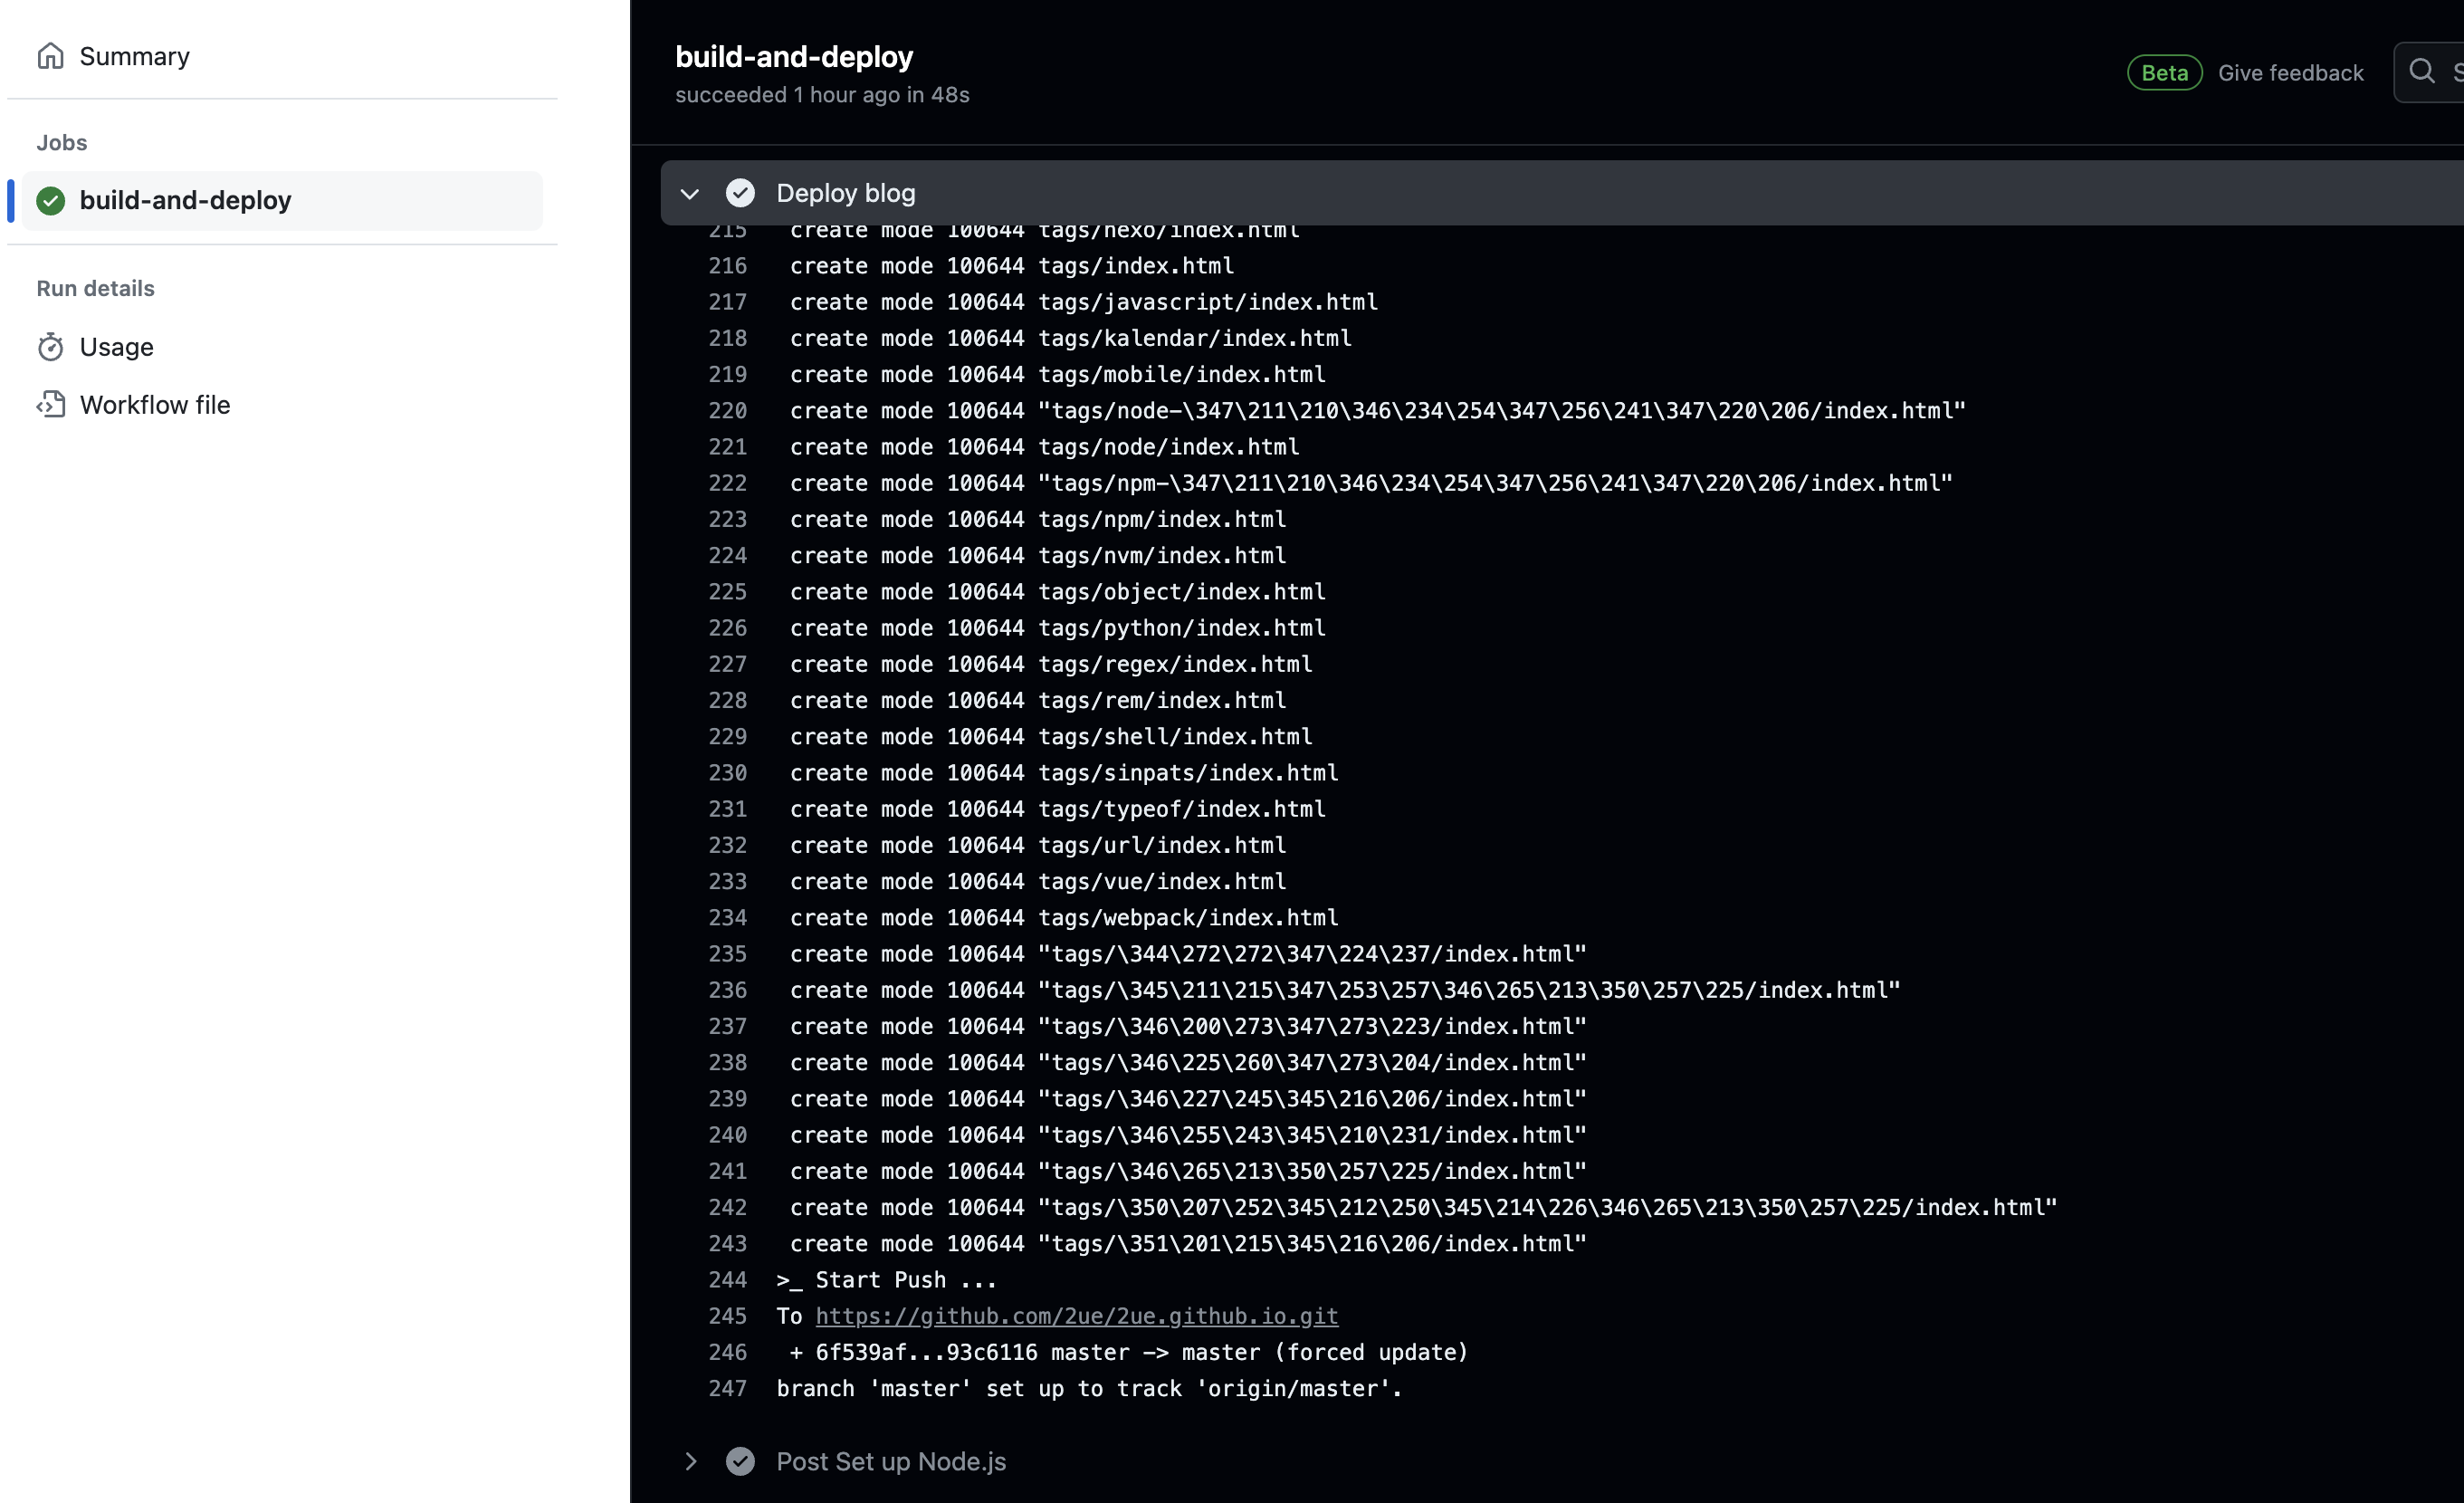
如果有失败,可以点击对应的步骤,查询详细情况:
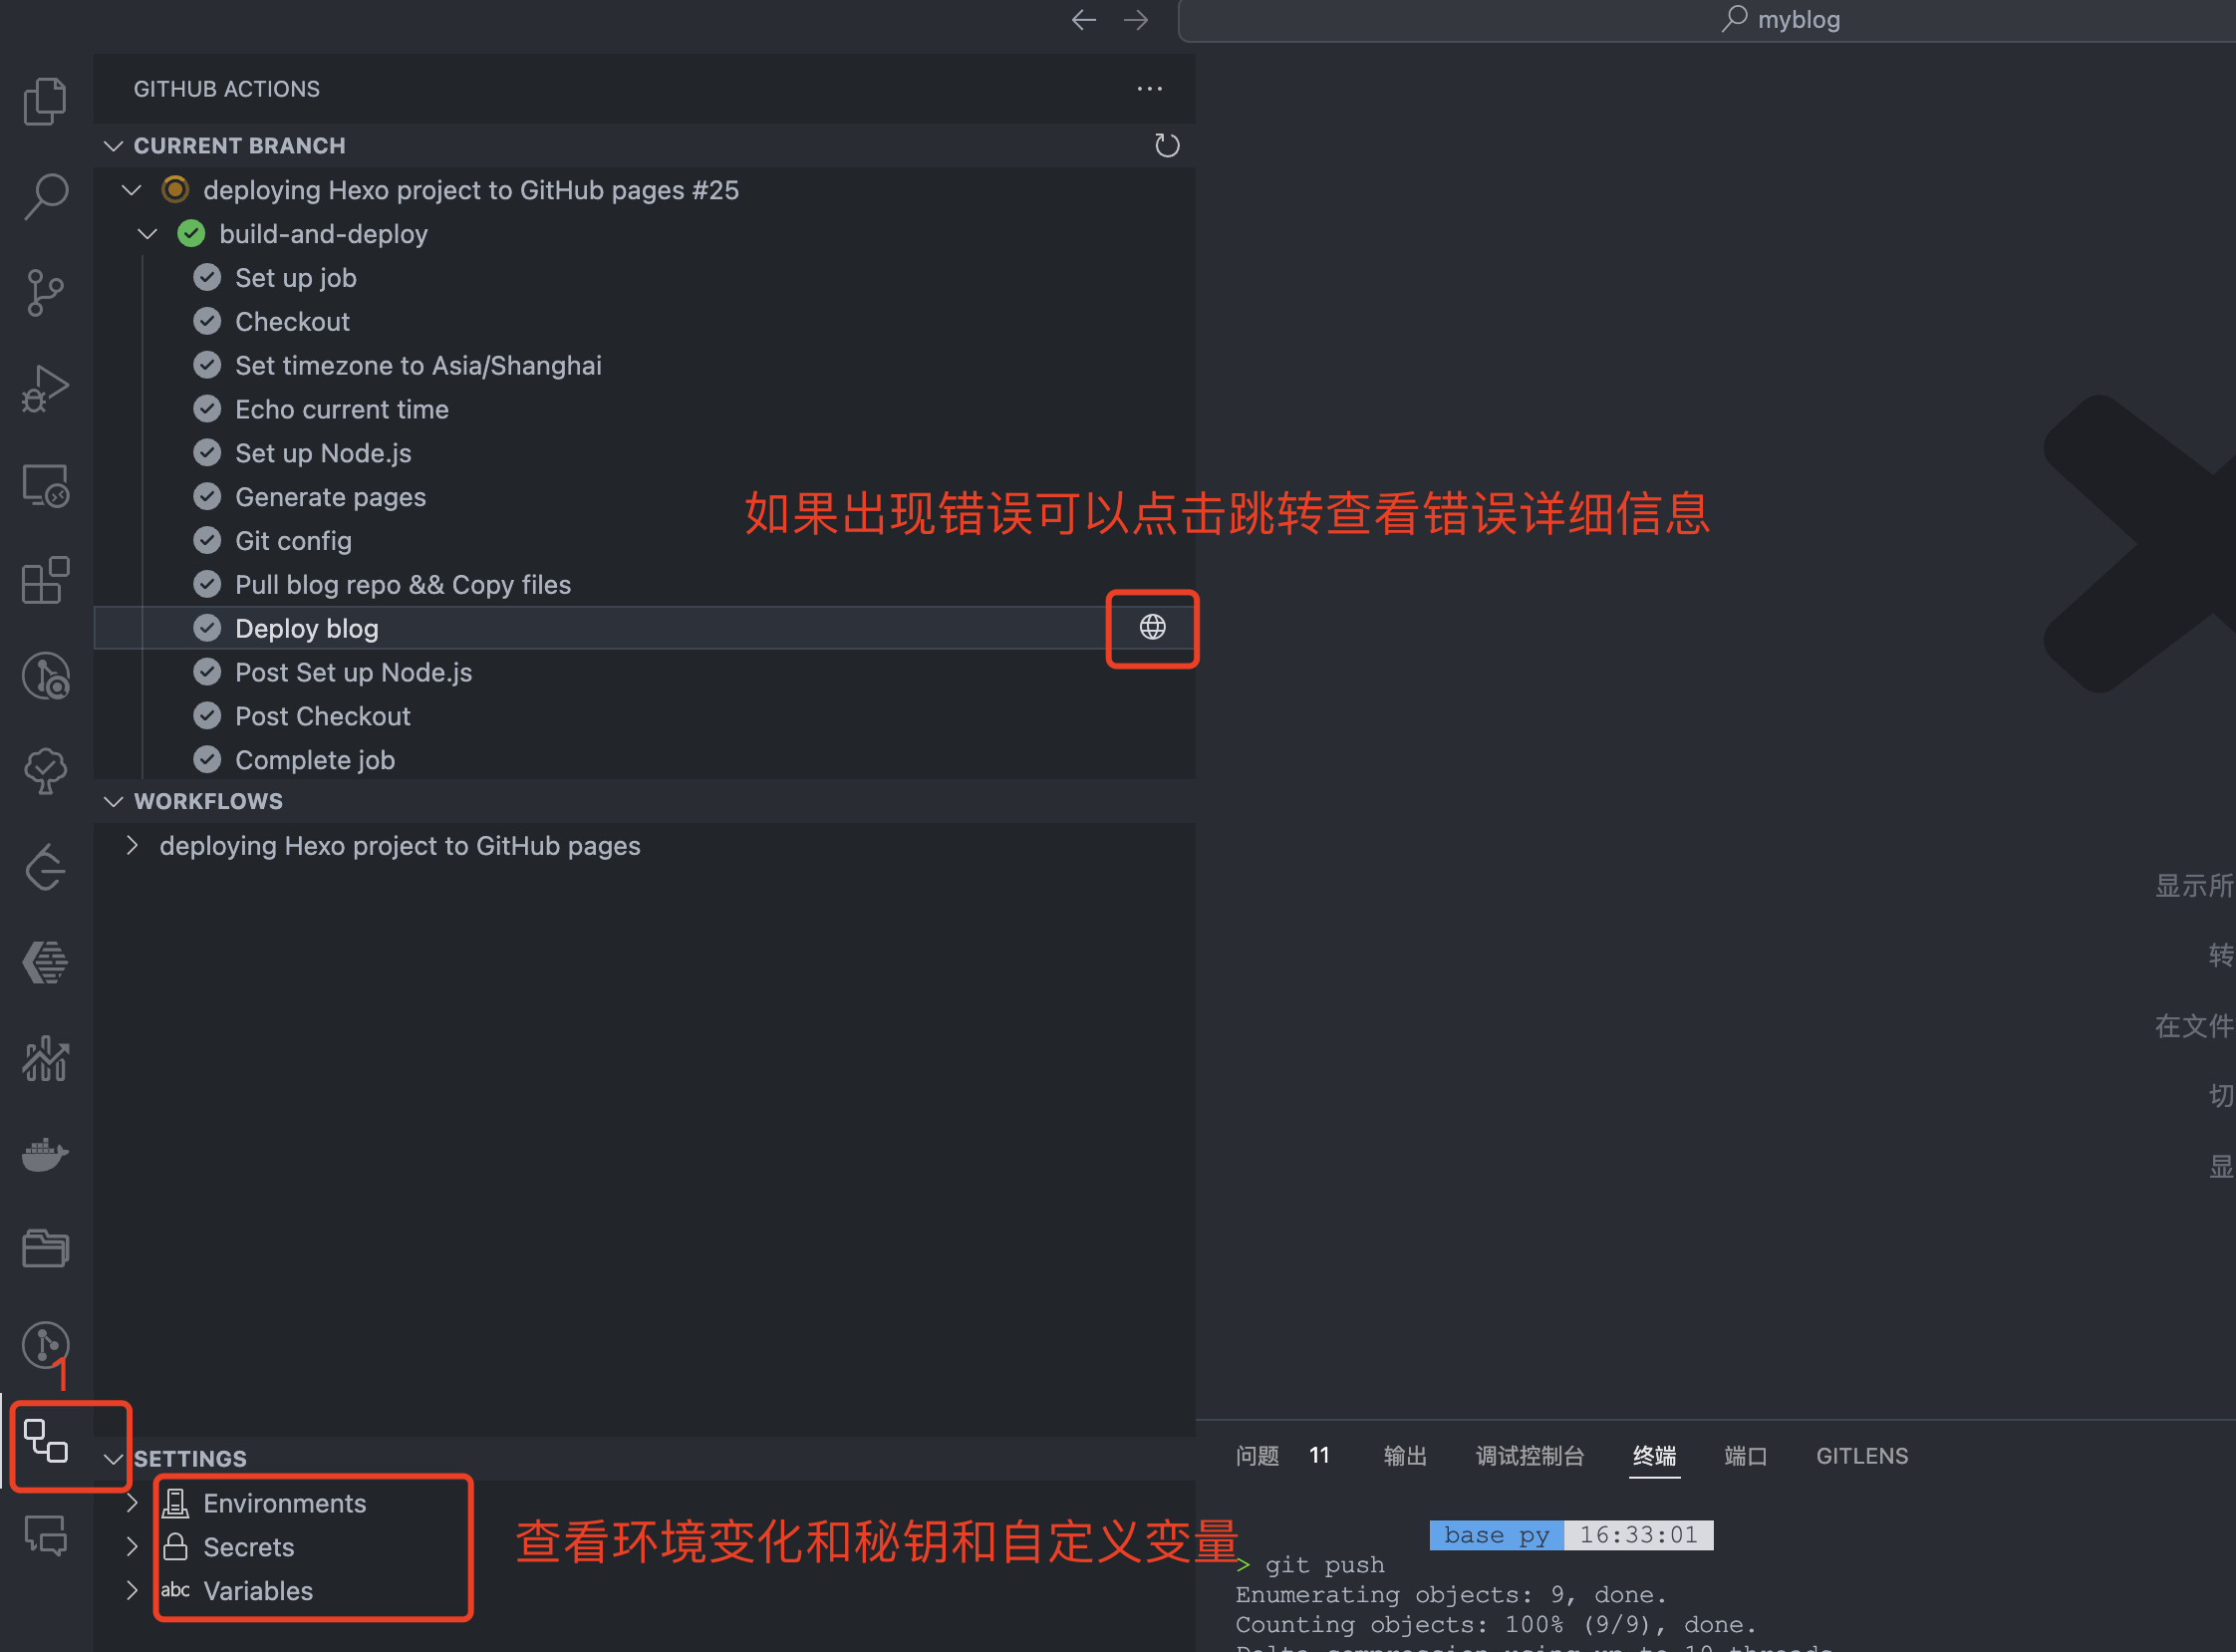
当然如果你使用的vscode,也可以安装Github Actions插件,然后再vscode中直接查看执行过程,不过在插件中没有办法查看失败信息,但是可以点击直接跳转到对应页面查看详细信息
参考
在 GitHub Pages 上部署 Hexo | Hexo
GitHub Actions 文档 - GitHub 文档